
For a while now, I’ve attempted to build an LED clock. My first attempt was about 16 years ago using a PIC18F452; it worked, but I wasn’t inspired by the development environment at the time, and I had to set the time manually. Truth be told, it was all awful.
In another attempt, I used an ATMega16. That got close, but once again, there was no easy Wi-Fi (at the time), and it was just not inspiring to work on. The attempt prior to this current one used the same four-module 8x8 LED displays with SPI control, but on an STM32F103 with a WizNet chip. It was written in C++ and worked well, but I unfortunately got swamped with work and never got back to it.
Recently, I’ve had a bit of spare time, so I decided I’d like to try Rust on something. I’ve previously had success with Embassy-rs on an embedded project using an STM32G431 with an audio codec. I liked the async nature of it, and it was a pretty good way to tackle the learning curve of Rust and the ecosystem. It wasn’t just printing text in a terminal—it was blinking lights and making noises with a codec!

And this is the result so far! I really enjoyed embassy once again, and my Rust is far less “rusty”.

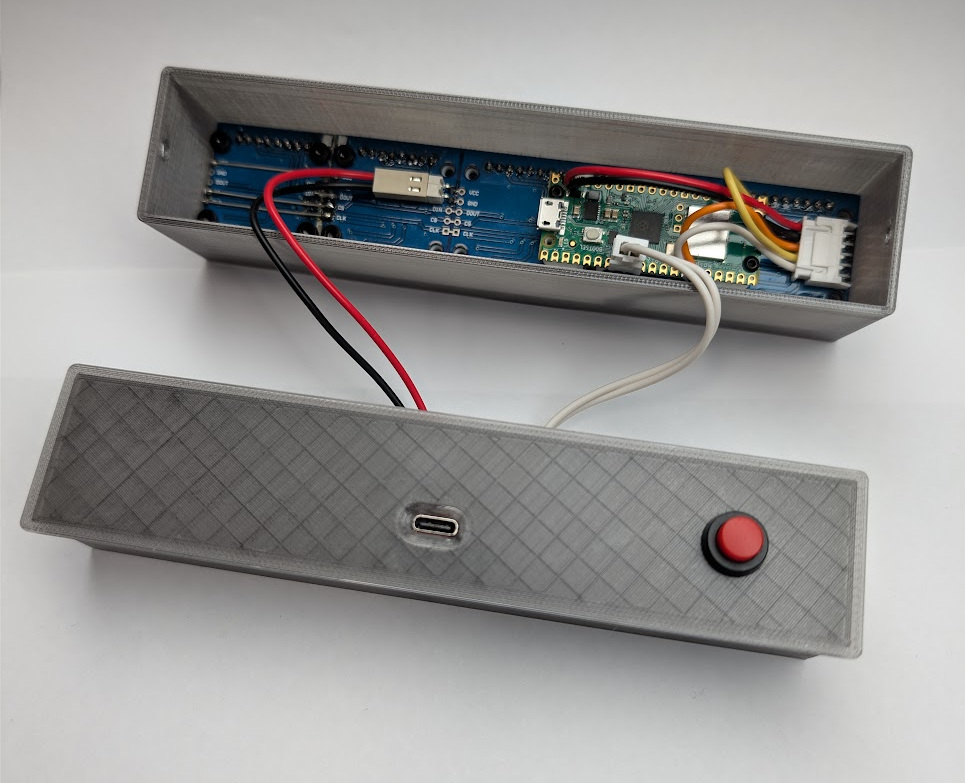
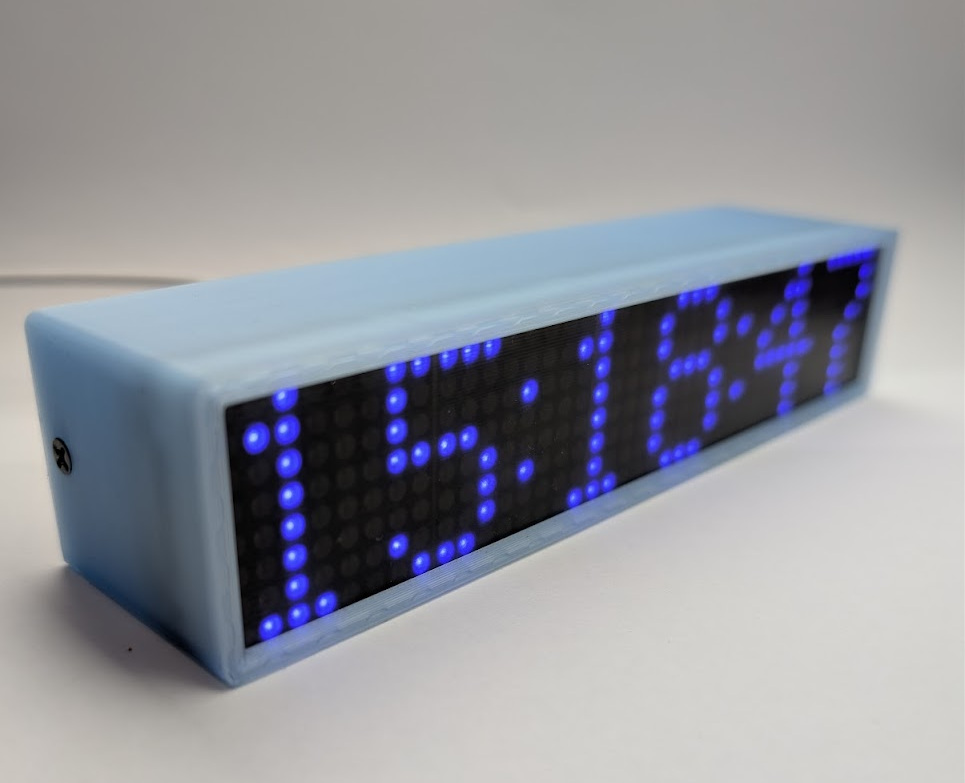
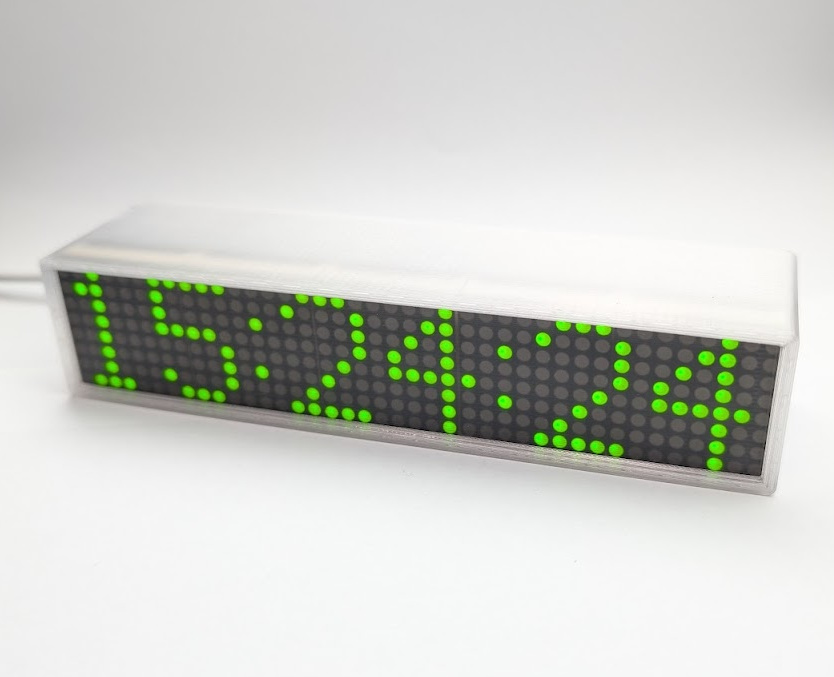
I ended up using a Raspberry Pi Pico W (which is fully supported in Embassy) as the cost is exceptionally low and it includes the onboard CYW43 Wi-Fi chip. I’m using the same 8x8 LED modules as before—I bought a bunch of them cheap years ago—but I was never happy with the character size, nor the fact that I couldn’t fit seconds on the display. Because of this, I set out to expand the display to five 8x8 LED modules.

To that end, I also disliked that these cheap LED assemblies were never flat out of the factory; the modules were simply pushed into machined pin headers that were soldered so poorly the displays were barely aligned with one another. So, out came the desoldering gun, and I removed the headers entirely. Because I needed to add a fifth module to the end, I designed a 3D-printed mount to hold the PCBs perfectly flush together while I resoldered the LED modules directly. The mount worked great, making the final display flat and rigid.
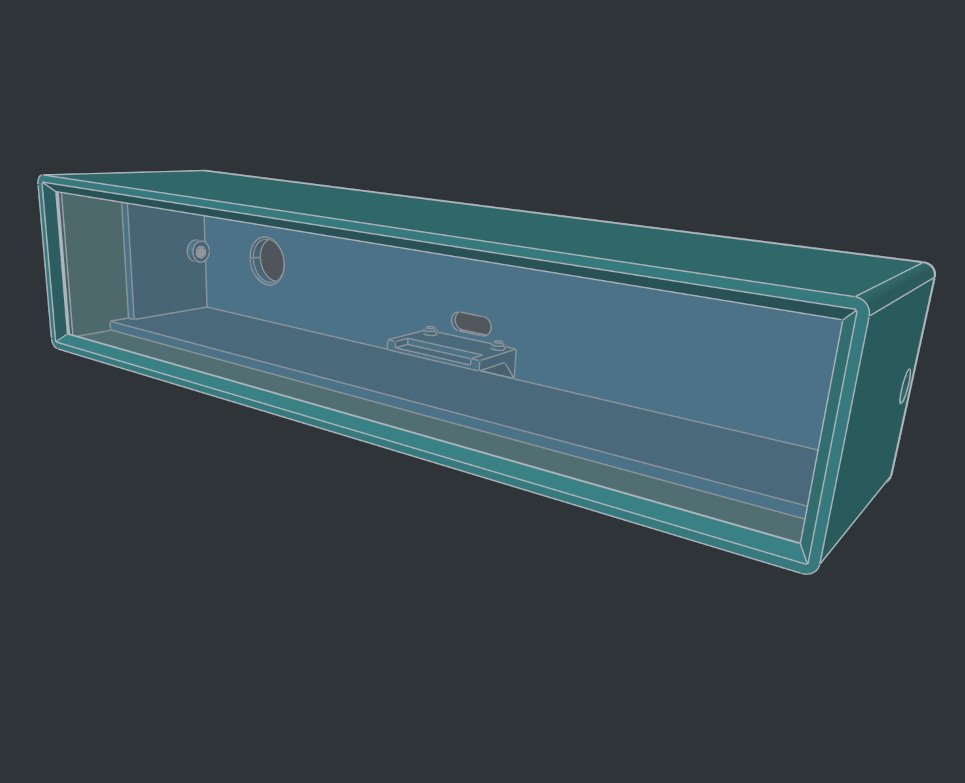
Next, I needed to mount the Pico W, so I modeled a bracket that provided clearance for the pins and securely attached it to the display module itself. The final 3D-printed case consists of three parts: the main enclosure, a front lens that sits before the display/Pico W stack, and a rear panel that houses the USB-C power input and a push button. The entire case sandwiches the PCB against the lens and the front bezel, making the whole assembly feel incredibly solid.
I designed the case and all the 3D-printed parts using FreeCAD V1.1. I’ve been using FreeCAD for a while, and the growth I’ve seen in the project is phenomenal. A lot of rough edges have been removed, and it has truly become a powerhouse tool. I enjoy working in it, I’ve made many neat things with it, and I couldn’t be happier with how this case turned out.
I particularly enjoyed how clean the USB-C mount is. I used those cheap, ubiquitous USB-C breakout boards and mounted the PCB onto two small printed studs that hold it perfectly aligned with the cutout hole. I then put a blob of hot glue underneath the board and pressed it firmly against the mount. So far, I have yet to break that bond, even when plugging and unplugging the cable. It’s incredibly rigid, and I think it would take a serious amount of abuse to make it fail. Best of all, if you ever need to remove it, a single drop of isopropyl alcohol weakens the hot glue bond instantly, and the board just pops right off. It feels like magic.
I will post more about the Rust project soon, but suffice it to say I like the asynchronous nature of Embassy and love how easily you can run multiple tasks at once. Additionally, the signaling, pub/sub channels, and atomic buffers that let you pass all sorts of information between tasks efficiently and safely are just amazing.
However, I’m not a huge fan of the build sizes. A 125-kilobyte clock firmware—which includes an NTP implementation, display animations, IPv4 networking (IPv6 is supported, but a CYW43 bug makes it not worth it at the moment), a captive portal for setup, and a web interface for controlling options saved to flash storage—somehow requires 2.6GB of disk space to build all the modules and Cargo packages. It feels a bit bloated and inefficient, but they are essentially shifting runtime complexity and safety into a compile-time problem. I guess if that’s the cost, disk space is cheap! Or it was in pre-AI time!
Leave a comment